
This post may contain affiliate links. If you use them we earn a small commission at no extra cost to you.
We'll be taking you through every part of our van, inside and out, talking about the choices we made when we converted it from an empty cargo van into a tiny home on wheels. You can read about materials we used, the layout we chose, if it was worth adding a full bathroom and shower, and how long we can last off-grid with this fully electric build.
Oh, and we'll be linking to all of our van build guides throughout, so if you're planning your own conversion you can take a deeper dive into how we did things.
Overview of Our Van Conversion
We purchased our Ford Transit at the beginning of 2021. It was a search that took several months and we had to look far and wide before finding the right van.
All told, we probably spent about one and a half years working on it. That was a lot longer than we ever expected, but we're happy we took the time to do it right, because now we're thrilled with how the van turned out.
We chose a 2020 High Roof Extended Ford Transit because of its size, as well as the ease of repair and reliability of Transits. With the layout we wanted and our heights, we knew we needed a large van to be comfortable.
Our van is laid out with the bathroom and kitchen in the front and a U-shaped seating area taking up the back half of the van. Our seating area converts into a bed that's just larger than a standard queen.


There are plenty of hidden features throughout our van that make it really comfortable and efficient, so continue reading below for specifics on each area.
We'll also cover the details of our electrical system, which allows us to both work remotely full time, and powers our kitchen appliances. We'll discuss our plumbing system and our super efficient hydronic heater that keeps the van warm, even in the winter, and supplies on-demand hot water.
Some Quick Facts About Our DIY Campervan
- 2020 Ford Transit High Roof Extended RWD
- Purchased in 2021 for $40,293 with 26,000 miles
- 620W of solar power, 30 amp alternator charger, and shore power hookup
- 400Ah lithium battery bank
- 3000W inverter/charger
- Cell signal booster, WiFi hotspot, and Starlink internet
- Wet bath with shower and composting toilet
- 30 gallon fresh water tank
- 15 gallon gray water tank
- Exterior storage box and 1UP bike racks
- Super Springs International suspension upgrades
- BFGoodrich All Terrain KO2 tires
- Full cost of conversion: $38,263
Full Van Tour Video

The Interior of Our Van
We chose a color scheme of dark lower cabinets and white upper cabinets for our interior, with light wood tones throughout the vinyl floor, counters, and ceiling.
We were aiming for a modern minimalist aesthetic in the design, which we feel like we pulled off pretty well. We wanted the van to look and and feel uncluttered, while still being cozy and not sterile.

Kitchen
Our kitchen counter sticks out into the sliding door entrance pretty far. This is probably one of our main complaints and we wish we had a bit more room to enter and exit, but trust us, we squeezed everything into the smallest space that we could make work.
We have flat black fixtures to match our lower cabinets and an undermounted 15" x 17" matte black sink.
Below that is a sneaky little tip out drawer for soap and a sponge. All of our drawers use heavy duty push-to-close slides, which saved us money on hardware and also gives everything a clean and snag-free appearance.
We've got a floor to ceiling slide out pantry that holds almost all our dry goods and is secured with a marine "slam latch". On the back side of the pantry is a full size mirror which, according to Laura, is a big deal.

We cook most of our food with this absolute champ of an appliance: the Ninja Foodi 9-in-1. Sometimes, if we want to conserve a little more power, we'll use our single burner induction cooktop.
Our fridge is a 130 liter model from TruckFridge with, you guessed it, a matte black finish.

Bathroom & Shower
The first thing you'd see stepping into our van is the wet bath. We custom built it around our 36" x 24" RV shower pan and used smooth FRP board for the walls and ceiling.
Our composting toilet is made by Air Head and has been simple to use and maintain. We have a Nautilus retractable shower door and a Peerless shower head that matches the rest of our hardware.
It's a tight fit, but we're so glad we added a full bathroom to the van. There's nothing quite like coming back from a day or two of backpacking and being able to immediately jump in a hot shower and then get in your bed, all right at the trailhead.
Seating Area & Bed
The main living space of our van takes up the rear half. When it's in 'seating mode' we have a U-shaped bench area that could easily seat five or more people and gives us plenty of space to eat, work, and relax.
We had our 5" thick high density foam cushions upholstered using Sunbrella outdoor fabric, which is really durable and has already saved us a bunch of times from stains.

When it's time for bed we remove one small cushion and the remaining four make our mattress. Our table, which is mounted on an EZ-Reach system, and a small folding 'coffee table' that we keep in one of the benches, fill the open space.

We installed two T-vent style sliding windows on either side of the seating area (and one in the sliding door), which creates a nice cross breeze when we have them open and our MaxxAir fan running.
Cabinets & Storage
Storage was a huge priority in this build, so we have loads of it. Our overhead cabinets extend from front to back. We built a headliner cabinet in the front, and put in three large drawers behind the pantry. We even have toe kick drawers in the kitchen and little bedside cubbies.
One of our favorite features is the custom storage pocket we built into the wall for holding our laptops. It makes them easily accessible, but also gets them out of the way and keeps them safe while we're moving (it's padded on the inside).
The floor of our seating area is raised up 4", which allowed us to efficiently run plumbing and electric from one side to the other, but it also created several feet of long storage underneath, which gives our 10' ladder a place to live.
Cabin
While there isn't a ton to say about the cabin, because it was basically untouched during the build, we did add WeatherTech floor liners and a 4k dash cam.
We're able to partition this area off with a black out curtain. That, along with our insulated window covers, help better insulate the van and keep out the light.
Systems That Keep Us Off-Grid
Between our power and water systems, we find that we're able to stay off-grid on public lands for about a week, with food and water being the limiting factors. We've got plans going into the next year to hopefully increase that, but for now here's a look at our systems.
Electrical System
We rely on electricity for everything. There's no propane in this build, so we installed a pretty robust electrical system. Our 620W of solar panels provide a good amount of power, but we can also charge the batteries while driving and plug into shore power if necessary.

After our first year we upgraded to a total 400Ah of Battle Born lithium batteries.
Our 3000W Victron MultiPlus inverter/charger gives us AC power and we have three of those outlets throughout the van, along with five 12V outlets.
The entire electrical system fits inside the passenger side bench.

Plumbing & Heating System
In the driver's side bench we have a 30 gallon fresh water tank, our water pump, and the guts of our hydronic heating system. The heater itself, an Eberspaecher HS3, is mounted under the van. Hot coolant gets piped in and passes through plate heat exchangers to give us on-demand hot water and air.
We have two adjustable vents installed in the bench to control air flow and the whole thing is controlled from a panel above our dresser drawers.
Below our shower, underneath the van, we mounted a 15 gallon gray water tank.
Internet & How We Work Full Time Off-Grid
During our first year of full time vanlife we relied solely on our T-Mobile hotspot and weBoost signal booster for internet. It worked very well and allowed us to stay in some remote places while still working full time.
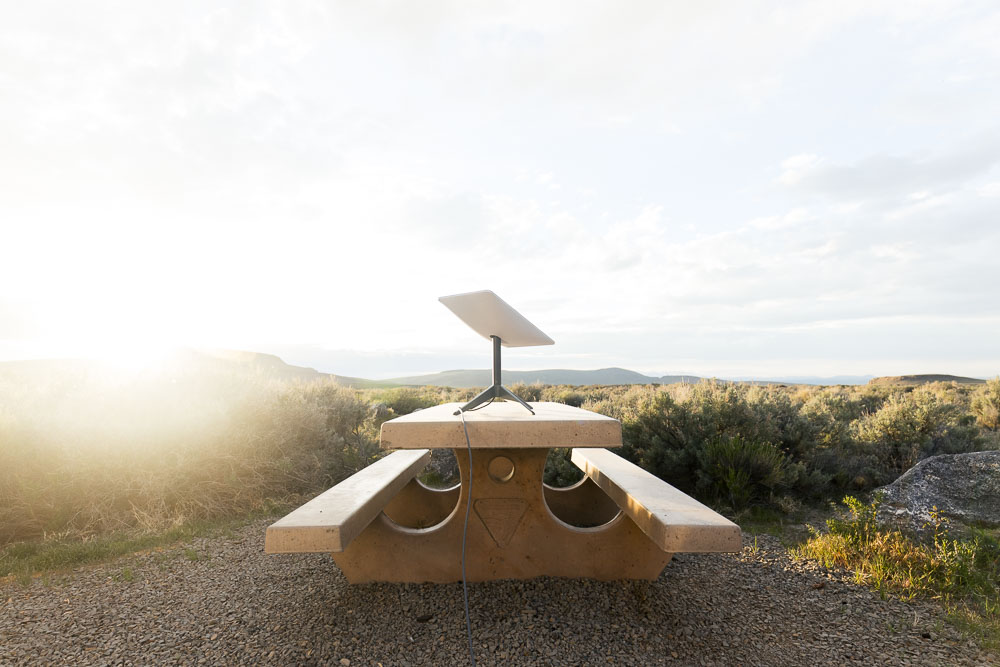
However, we decided going into year two that we wanted to be in some really remote places even longer, so we took the plunge and bought Starlink.
The first thing we did was pitch the router and wire everything up on 12V, with a switch, so that we can conserve as much power as possible.
Want a Free Month of Starlink?
If you haven't already signed up for Starlink and want one month of free service (that's $165!), use our referral link. We also get a free month so, for that, we say: thank you, you're awesome!
Exterior Upgrades

Bike Rack & Storage Box
If you follow us on social media you might remember when our bikes were stolen, right off the back of the van! Nonetheless, we have two 1UP bike racks mounted above a Rover Vans Expedition box on our back doors. The box has been incredibly useful for storing things we don't want to keep inside the van, like oil, our recovery boards, and a collapsible bucket.
Suspension Upgrades
After a few months on the road in a very tall, very heavy van we felt the need for some suspension upgrades. Being DIYers at our very core, we went with Super Springs International products and added them to the front and rear of the van. That tightened everything up very nicely in windy conditions and has made for a much smoother ride, especially on the washboard dirt roads that we frequent.

Total Conversion Cost
We get plenty of questions about the cost of our van build and we know it was one of the biggest things on our minds, starting from the planning and prepping phase. We tracked every.single.purchase we made for the van in a spreadsheet, so we have an accurate answer for you: $38,263.
If you're interested in a more details we have a blog post with a full price breakdown and a list of many of the products and materials we used.
Feeling inspired? Save it for later!

Planning your own build? Start with our guides:


Some of the links found on our website are affiliate links.
As Amazon Associates we earn from qualifying purchases. We may also receive a small commission at no extra cost to you through other links. Using them is a way of supporting us, helping us offset the cost of running this website, and ensuring that we’re able to continue providing free content and resources.
That makes y’all totally awesome and we truly appreciate the support!
If you've found value in our guides, you can say thanks with a virtual coffee.


Lorem ipsum dolor sit amet, consectetur adipiscing elit. Suspendisse varius enim in eros elementum tristique. Duis cursus, mi quis viverra ornare, eros dolor interdum nulla, ut commodo diam libero vitae erat. Aenean faucibus nibh et justo cursus id rutrum lorem imperdiet. Nunc ut sem vitae risus tristique posuere. uis cursus, mi quis viverra ornare, eros dolor interdum nulla, ut commodo diam libero vitae erat. Aenean faucibus nibh et justo cursus id rutrum lorem imperdiet. Nunc ut sem vitae risus tristique posuere.
Delete